.webp)


.webp)


.webp)


.webp)


Welcome to ZUTTO
Free shipping for newsletter subscribers (some areas excluded)
- トップページ/
- ZUTTO Journal/
- 選び方・使い方/
- Using the Kintsug...

We tried our hand at kintsugi for the first time using the "Kintsugi Coffret" from Tsutsumi Asakichi Urushi-ten.
This time it was staff member M who took on the challenge. She loves tableware, and every time she came across a lovely piece while traveling or wandering into a shop, her collection of dishes would slowly grow. As a result, every piece in her home holds special memories for her. But no matter how carefully you handle your dishes, breakage and chipping are bound to happen sooner or later. Each time it did, the thought of "kintsugi" would cross her mind, but when it came time to actually try it, she found herself hesitating, thinking things like "it looks difficult" or "maybe I should start by taking a kintsugi class somewhere," and never quite getting around to it. So she had kept several broken pieces set aside, waiting for that someday.

It was around that time that she came across the "Kintsugi Coffret," a kintsugi kit made by Tsutsumi Asakichi Urushi-ten that comes with video instructions. She had imagined the videos would be little more than the instruction manual made a bit easier to understand, but once she actually tried following along, she found that the videos—clearly made with first-timers in mind—were extremely easy to understand, and she was able to move smoothly through everything from preparation to cleanup, far more smoothly than she'd expected. Through trying kintsugi, she found her attachment to her tableware deepened even further, and she truly felt the joy of repairing something and being able to use it for years to come.
Now, let's take a look at the restoration process.
This time she took on the kintsugi repair of these two pieces. Here is their condition before restoration.

The first piece was a decorative plate, one of a set of five received as a gift. It broke when a cup was accidentally dropped on top of it while she was clearing up.
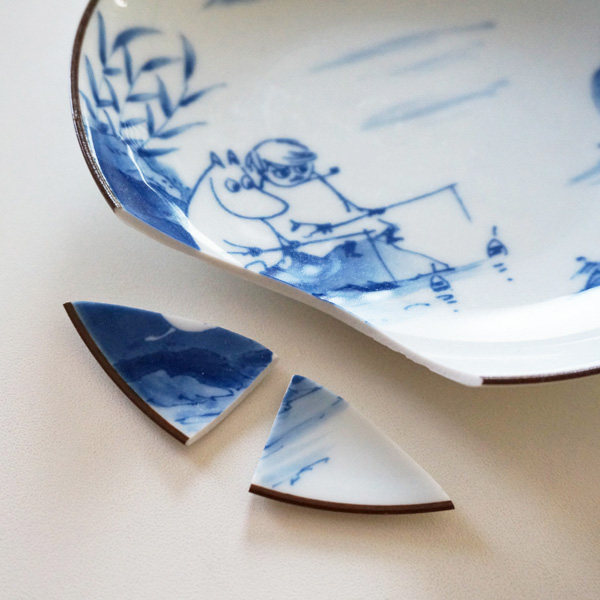
It had broken into three pieces.
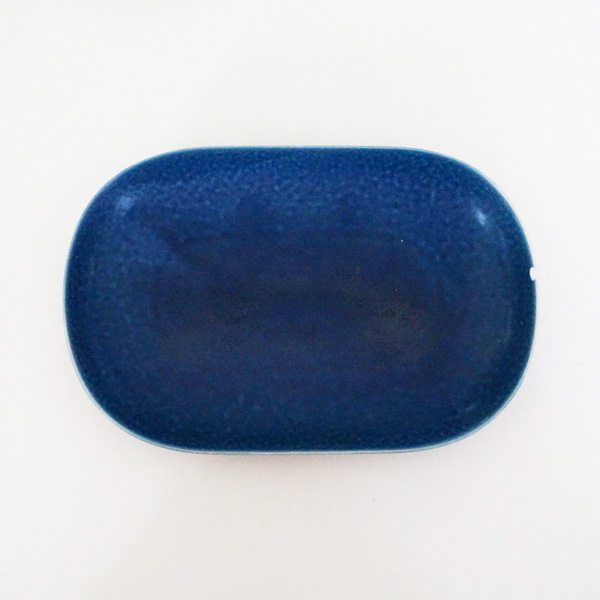
The other plate had chipped at some point, likely from being knocked against something, though she wasn't sure exactly when or how.
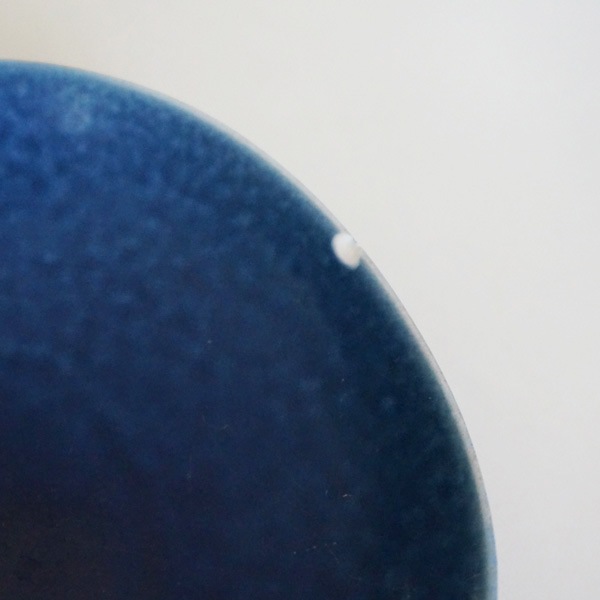
Because of this, the broken piece was never found. (Now that she knows kintsugi is possible, she plans to keep even small fragments from now on.)

Here is what's included in the Kintsugi Coffret set. Aside from things like flour and salad oil that every household already has on hand, everything—including all the necessary tools—is included, so there's no need to purchase anything extra for kintsugi. Also, since each round of work produces a certain amount of prepared material, it's recommended that you work on several pieces at once so that nothing goes to waste.
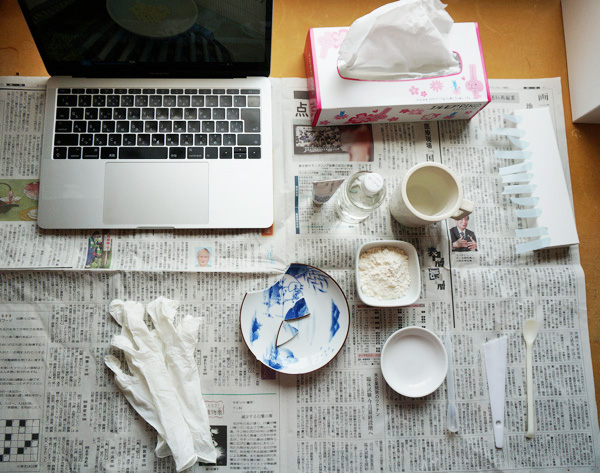
Feeling nervous and expecting this to be difficult, she got everything ready by following along with the video, and finally began.
The first step was gluing the broken decorative plate back together. This is done using "mugi-urushi," a paste made by mixing flour, water, and high-grade urushi (Japanese lacquer) made for kintsugi.

The urushi ended up getting on various things, but as long as you're still in the middle of working, any lacquer that gets on the dish itself can easily be wiped off with turpentine oil. (Once it dries, it becomes much harder to remove.) As the video also points out, if lacquer gets on your gloves, it will spread like a stamp wherever you touch, so if you keep wiping your hands as you go, you can avoid making much of a mess.
The videos explain each step very thoughtfully—for instance, reminding you to cut your masking tape ahead of time before starting a task. Where the printed instructions simply say "an appropriate amount," the video tells you specifically, "so many drops." So as long as you follow the video step by step, you shouldn't run into trouble. That said, it helps to first read through the included paper instructions to get an overview of the whole process before you begin, and then, before starting each day's work, watch that day's video segment all the way through once. This way you can better understand the points to be careful of and the meaning behind each step as you go.
At the end of every step comes a period of drying (curing). Urushi is a material that hardens as it dries in a warm, humid environment. So after each step, you place the piece in a drying box called a "muro," along with a damp towel, in order to keep the humidity up while it cures.
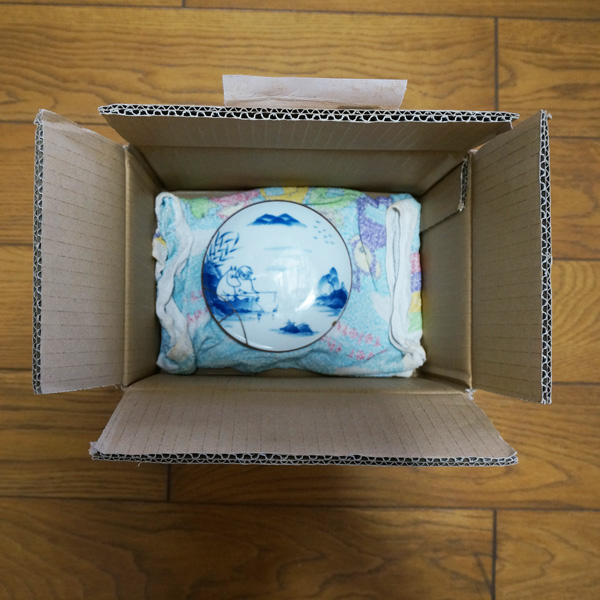
This is the muro used for this kintsugi project. Before starting, she had imagined something elaborate would be needed, but in fact all you need is a container large enough that the piece can be placed in and taken out without touching the cardboard or the damp towel—it doesn't need to be big. (If anything, if it's too large, the humidity won't rise as easily, so a size that suits the piece is best.)
Once the mugi-urushi has dried, the next step is called "sabitsuke," which fills in any dents at the chipped or glued areas. Using "sabi-urushi"—a paste made from tonoko (fine clay powder), water, and high-grade urushi for kintsugi—you fill in the unevenness at the break and restore the chipped area to its original shape.
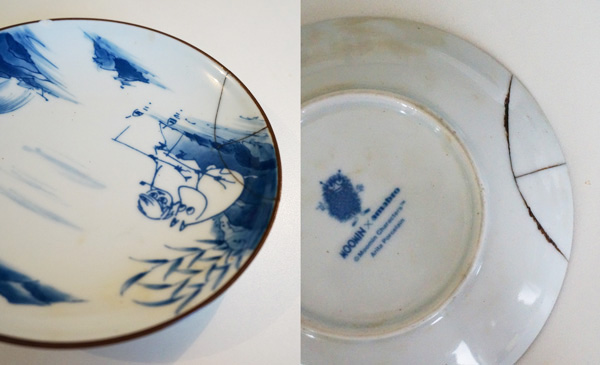
She had thought the plate had broken cleanly, but once she started filling it in, she discovered that the underside was actually quite chipped, as you can see here.
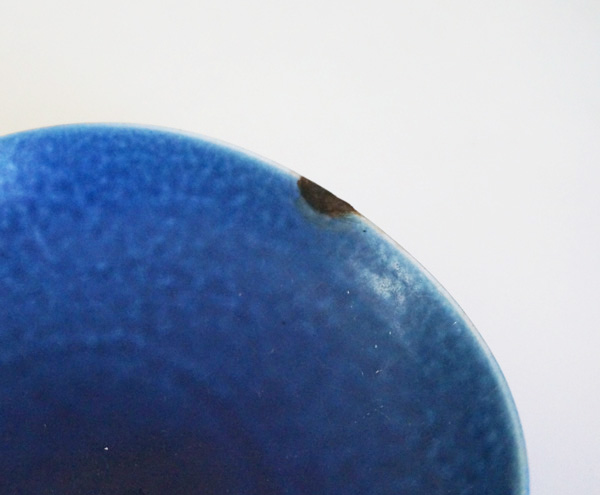
Where the chipping was more severe, the moisture evaporated overnight and left a slight dip, so she applied an extra layer of sabi-urushi to fill it in. The video also carefully explains how to store any leftover material and how long it will keep, so nothing goes to waste. And, as with the steps that follow, it's easy—especially the first time—to tense up worrying about what happens if you make a mistake, but since most steps can be redone or reversed, there's no need to feel too pressured; you can move forward with confidence.
Once the sabi-urushi has dried, you smooth the surface with waterproof sandpaper, and then move on to the step called "nakanuri," or mid-coating. Using a brush, you apply e-urushi (decorative lacquer), tracing over the sabi-urushi.

I was worried about the line becoming faint, so I kept adding more e-urushi (drawing lacquer) as I went, but freshly squeezed e-urushi straight from the tube is actually very smooth, and I could draw lines far more easily than expected. It seems best not to add too much and instead draw as thinly as possible. (If the line becomes too thick here, you'll need a lot more gold powder later when scattering it on!)

After it dries, I sand it again with water-resistant sandpaper, then apply e-urushi once more, and finally it's time to scatter the gold powder. Using a brush called a kebo, I pick up gold powder and sprinkle it gently onto the e-urushi. If the e-urushi is applied too thickly, the gold will sink in and you'll end up needing much more gold powder, so it's important to work carefully and slowly here. Before starting kintsugi, the maker had told me, "Especially at the beginning, you'll find the gold powder disappears quickly," and doing this step made me understand exactly why. This time, I used about one packet (0.1g) for two plates. Once the gold powder has been scattered, I place the piece in the muro (humidity box) to fully harden the urushi and fix the gold powder in place.
After that, I apply kintsugi-grade joseiurushi (refined raw lacquer) diluted with turpentine oil over the repair to increase its strength, and finally polish it with doro powder and polishing powder to complete the piece.
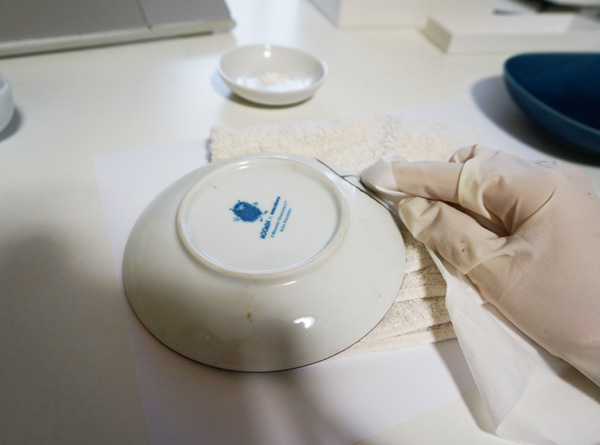
At first I spread out a large sheet of newspaper, but as I worked I came to understand which steps were likely to get messy and which weren't, so by the end I was working in a small space like this.
Here is the piece, successfully restored after about two months.

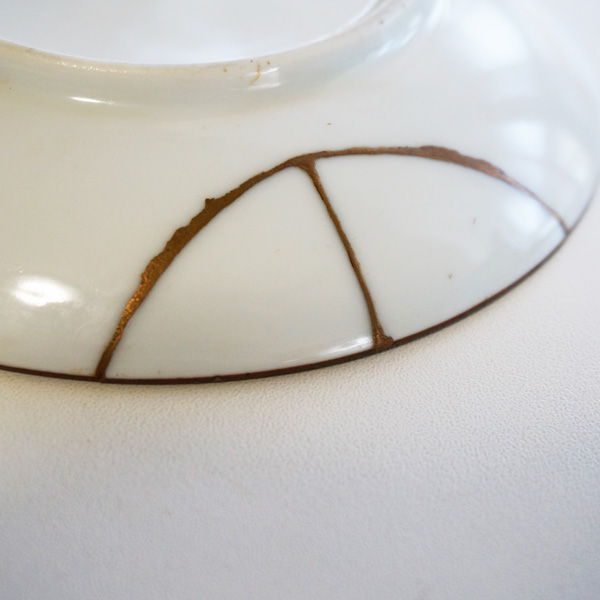
The crack has fused together perfectly.
Before starting, I thought kintsugi would be "so time-consuming!" but what I learned by actually doing it is that each individual step doesn't take much time at all (though it depends on the size of the break, each session, including preparation, took about 30 minutes to an hour). Since drying mostly just means leaving the piece alone, occasionally dampening a towel nearby, the actual hands-on time is minimal. That said, you do need to set aside time regularly to keep progressing, so I think taking a little time each weekend lets you move forward without strain. Urushi can cause a skin reaction if it touches your skin directly, so especially in households with small children, it's reassuring to tackle this after the kids have gone to bed.
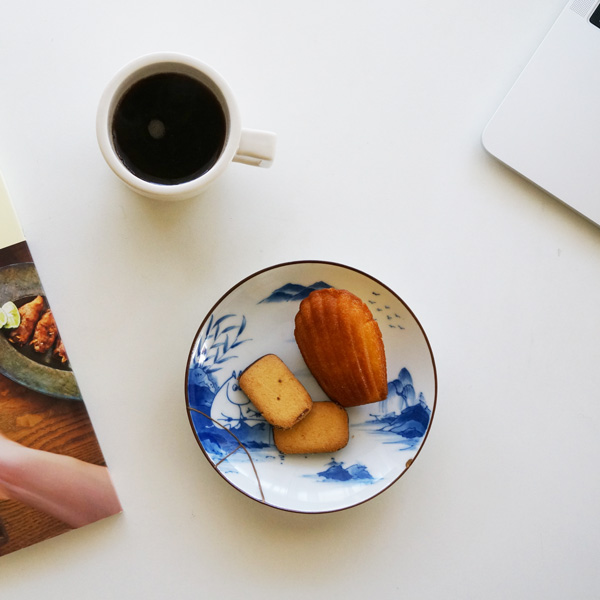

The piece, restored through kintsugi, has returned to our dinner table. There are a few things I'd like to try differently next time, but my attachment to this cherished piece has only grown. It took time to finish, but I truly felt the joy of restoring something with my own hands, and I'm also happy to have gained the confidence that if a piece ever breaks again, I can repair it myself using this kit. Now, every time I use this kintsugi-repaired piece, I feel a warm, happy sense of pride knowing I fixed it myself.
We asked suosikki, the urushi art unit in charge of the video tutorial, to take a look at the piece our staff member repaired using kintsugi.
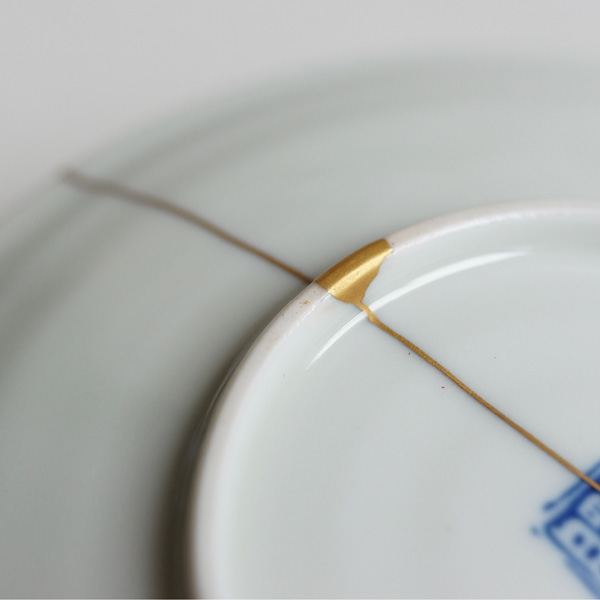
This is the piece that was restored in the video.
・In the video, the gold on the plate suosikki repaired looks whitish and bright, while the plate our staff repaired has a somewhat darker color. What might explain this difference?
↓
It's possible that a thick layer of ki-urushi (raw lacquer) used for the powder-fixing or hardening step remains. When this hardening layer of raw lacquer is too thick, a brownish film of raw lacquer forms over the gold powder, giving the whole piece a brownish overall finish.
As raw lacquer dries, it gradually turns a deeper brown, but while it's still wet during the work itself, it's nearly transparent, making the brown tint hard to notice—so caution is needed. After applying raw lacquer over the gold powder, be sure to carefully blot it off with tissue until no more lacquer comes off onto the tissue.
That said, as time passes, the brown raw lacquer gradually becomes clearer again, and the gold's color will improve. The finish is at its darkest and brownest right when it's completed, and it will develop a more beautiful color as you use it. Please enjoy watching that change happen.
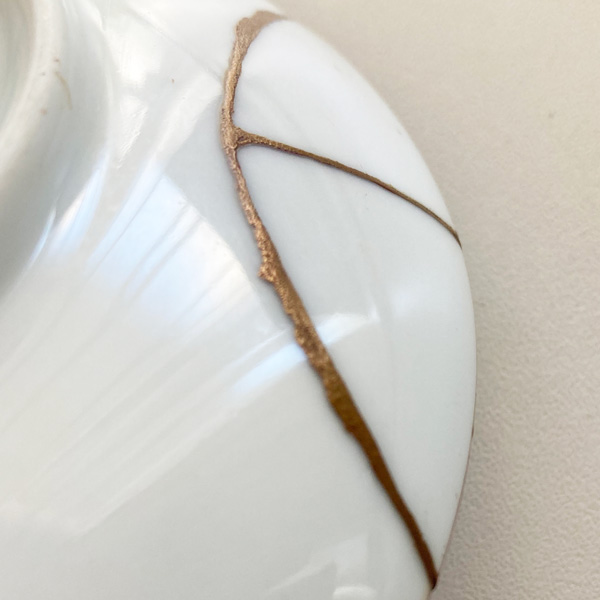
・The surface ended up with a bit of unevenness—what might have caused this?
↓
This is likely due to how the e-urushi was applied and how the gold powder was scattered.
If the e-urushi is applied too thickly and it takes time to scatter the gold powder, the powder that lands in clumps will absorb the e-urushi and form lumps, resulting in an uneven, bumpy surface (called yuzu-hada, or "citrus peel" texture). The trick to a clean finish is to apply the e-urushi as thinly as possible and scatter the gold powder quickly.
That said, achieving a perfectly smooth gold finish is difficult even for professional craftspeople. As you work through several kintsugi repairs, you'll gradually pick up the knack for it.
So carefully working through each individual step really does affect the final finish. Rather than pressuring yourself to finish by a certain day, it's important to check your work carefully, go back and redo things when needed, and move forward slowly.
We also asked about one more thing that had been on our mind.
・We once came across another kintsugi kit that said "not for use with tableware." What's the difference between that kind of product and this kintsugi coffret?
↓
This is because such repairs use synthetic resin adhesives that are harmful to the human body and do not pass food sanitation laws. Strictly speaking, that kind of repair cannot be called traditional kintsugi (the art of repairing pottery with lacquer). With the Kintsugi Coffret, you can try your hand at authentic, traditional kintsugi with peace of mind, since it uses natural urushi (Japanese lacquer) refined by Tsutsumi Asakichi Urushi-ten, a shop specializing in raw lacquer materials.
Notes on Using Kintsugi-Repaired Tableware
Urushi becomes stronger over time. Although a kintsugi-repaired piece can be used as soon as it's finished, letting it rest for about three months will increase its durability and allow you to use it for even longer. For everyday use, please keep the following points in mind.
・Wash with a soft sponge after use.
・Do not use a microwave, dishwasher, or soak-and-scrub washing, as these can cause the coating to peel.
・Be careful, as metal cutlery striking the kintsugi-repaired area with force can cause scratches.
▽Product page here

GUIDE »
CONTENTS »
CATEGORIES »
- + Gifts by recipient
- + Gifts by scene
- + Clothing
- + Bags / Backpacks
- + Wallets / Card cases
- + Jewelry
- + Shoes
- + Rainy day outfits
- + Kitchen
- + Home
- + Babies / Kids
- + Japanese products
Earn Miles


Payment & Security